Created Date:2021.08.16
Updated Date:2026.04.16

Whether you are designing mechanical parts to remove sharp, dangerous edges, or detailing architectural woodwork, you need a quick way to bevel corners in your DWG files.
This guide skips the fluff and walks you straight through the most efficient ways to use the Chamfer command, saving you time and keeping your designs accurate.

実は、AutoCAD は標準で JWW 形式に対応していません。
DARE ONE なら、JWW から DWG / DXF への高精度な変換がブラウザ上で今すぐ無料で完了!
拡張子の互換性に悩まず、スムーズに作図作業へ移りましょう。

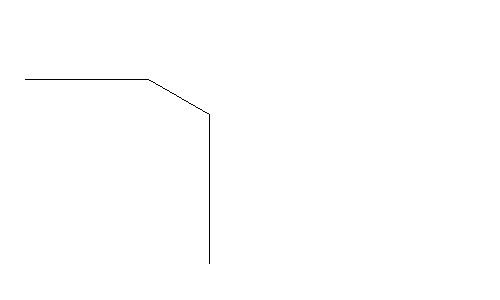
"Chamfering" refers to the process of cutting away a sharp edge or corner to create a flat, angled (beveled) surface. The primary reason for chamfering is to enhance safety.
In mechanical drafting, leaving sharp metal corners increases the risk of users cutting themselves or damaging other components. By applying a chamfer, you eliminate these hazards, preventing injuries and protecting mating parts from scratches. You will often see chamfers applied to woodwork in architectural designs for the exact same reasons.
Beyond safety, chamfers also serve highly functional purposes. For example, adding a chamfer to the edge of a hole or a pin acts as a guide (a lead-in), making it much easier to align and insert mating parts during assembly.
In CAD and manufacturing, it is important to use the correct terminology when defining edge breaks:
You can activate the command using either the ribbon or your keyboard. For professional workflows, using the keyboard shortcut is highly recommended.

CHAMFER (or simply CHA) into the command line and press Enter.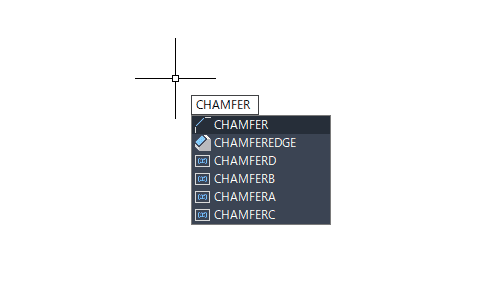
This is the most common method. You define exactly how much material to "cut back" from the corner along each intersecting line.
D (for Distance) and press Enter.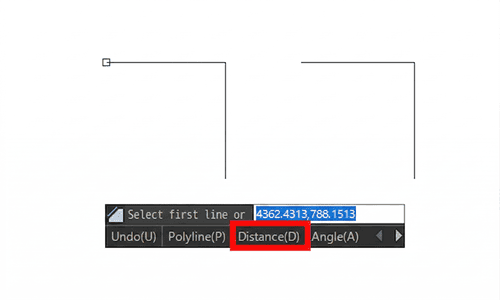
5) and press Enter. 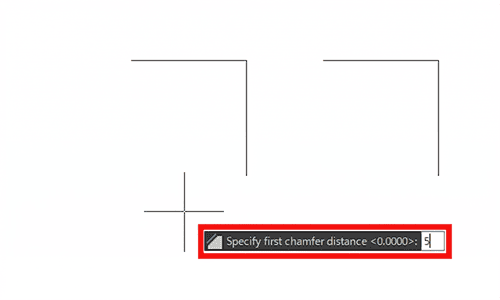
10) and press Enter.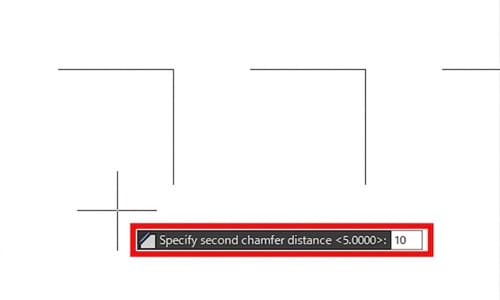
Here is how the chamfer distances are applied: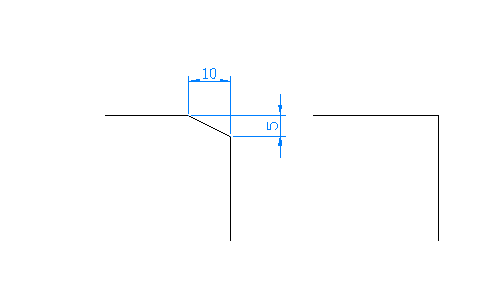
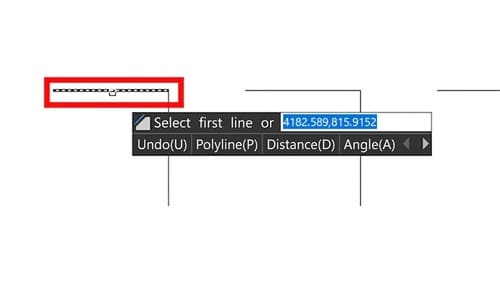
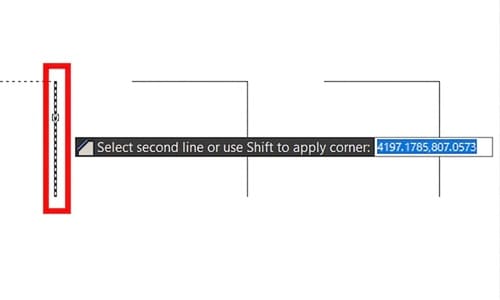
Pro Tip: The first line you click will use the first distance, and the second line will use the second. Reversing your click order will reverse the angle of the chamfer!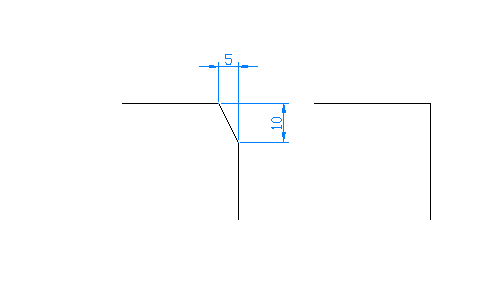
If your manufacturing tolerances specify a precise angle (e.g., a 30-degree bevel), use this method instead.
CHA and press Enter.A (for Angle) and press Enter.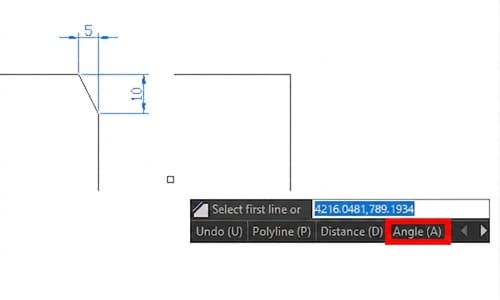
10) and press Enter.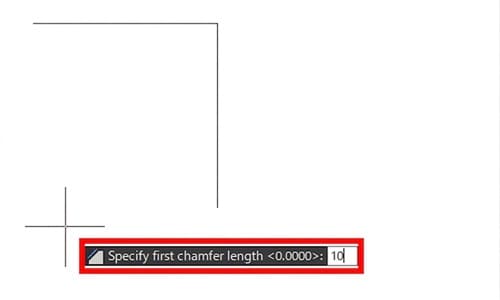
30) and press Enter.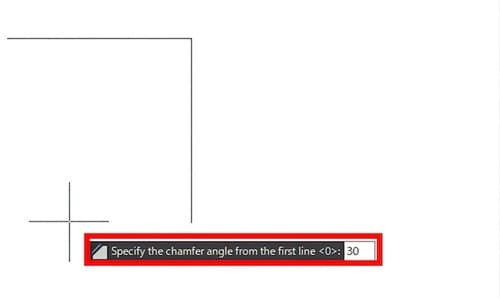
Here is how the chamfer distances are applied: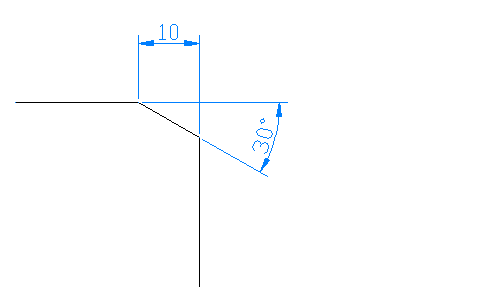
Reversing your click order will reverse the angle of the chamfer.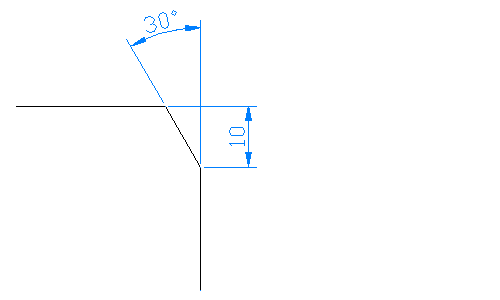
Stop wasting time clicking individual corners on complex shapes. Use these options to speed up your drafting:
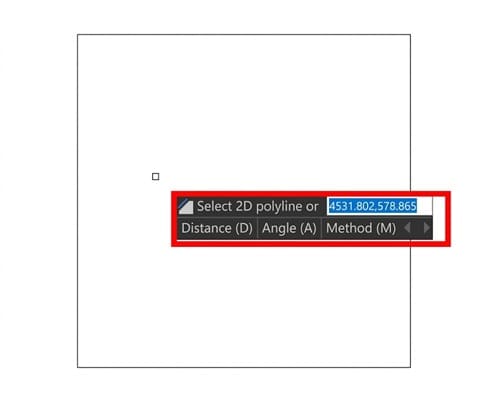
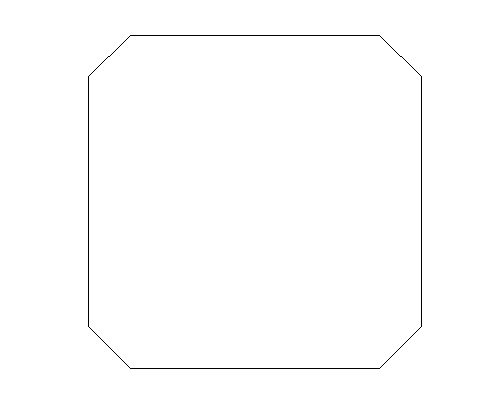
Need to bevel all four corners of a rectangular plate simultaneously?
CHA).P for the Polyline option.

If you need to chamfer multiple separate corners with the same dimensions, type M for the Multiple option after starting the command. 
This keeps the tool active, allowing you to click pairs of lines endlessly without having to restart the command each time.
In this guide, we explored the fundamental ways to use the Chamfer command in AutoCAD. Because beveling edges is a critical step in almost every industry's drafting process, mastering this tool will significantly speed up your daily workflow.
This article was created using the AutoCAD Free Trial.
For a step-by-step guide on how to install the free trial version of AutoCAD, please check out the link below.

Mastering AutoCAD tools like Chamfer makes your drafting process faster, but what happens when you need to share those files across different platforms?
Dealing with version incompatibility errors, lost layers, or garbled text when sharing DWG and DXF files with clients or contractors is a massive headache.
Streamline your file handling with DARE.
DARE is the ultimate CAD conversion cloud service designed for professionals. Whether you need to seamlessly convert PDF to DWG, downgrade newer DWG files for older CAD software, or ensure your 2D data translates perfectly globally, DARE handles it in seconds.
Try DARE for free today and eliminate file format friction from your engineering workflow!