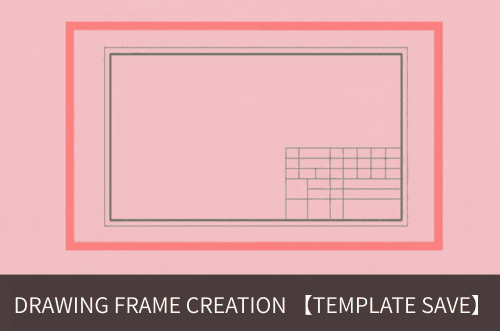
Creating a Drawing Frame and Defining a Template
This guide explains how to create a drawing frame (title block) and define it as a template in IJCAD. By defining a drawing frame template, you can simplify operations when creating drawings.
目次
「開けない図面データが送られてきた…」そんなお悩みを1分で解決
DARE はブラウザだけで DWG・DXF・JWW・PDF などを相互変換・バージョンダウンができる無料サービスです。
ソフトのインストールも、面倒な待ち時間も不要。今すぐ変換して業務を再開しましょう!

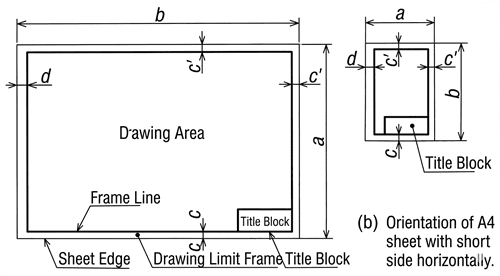
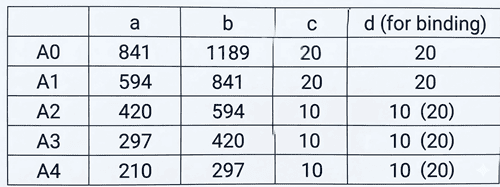
Drawing Size and Drawing Frame
The drawing size becomes the edge of the paper, and the drawing frame has margins set as shown below.
!
Creating a Drawing Frame in IJCAD
Start IJCAD and create the A3 paper edge and the drawing frame outline using the rectangle function.
How to Create a Drawing Frame in IJCAD
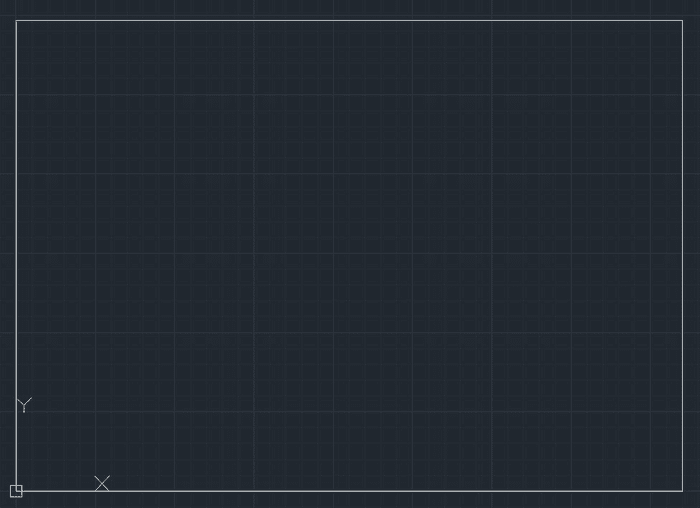
- Create the drawing frame (paper edge).
Execute the 「Rectangle」 command.
「Specify first corner point or」->「0, 0」Enter
「Specify other corner point or」->「420, 297」Enter
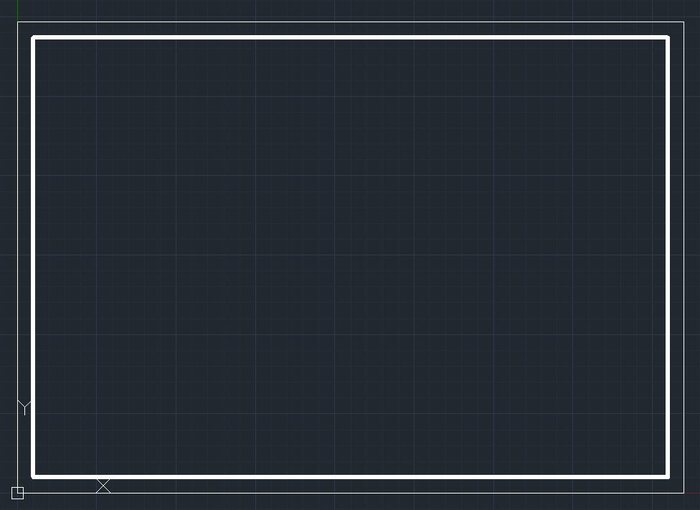
- Create the outline of the drawing frame.
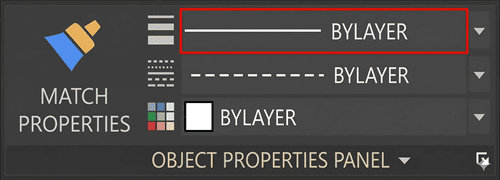
Change the line weight of the drawing frame to 「0.5mm」 in 「Object Properties Management」.

- Create the outline.
Press Enter to execute the 「Rectangle」 command.
「Specify first corner point or」->「10, 10」Enter
「Specify other corner point or」->「400, 277」Enter
※If the display of the drawing frame's line weight does not change, right-click on the screen to display the dialog.
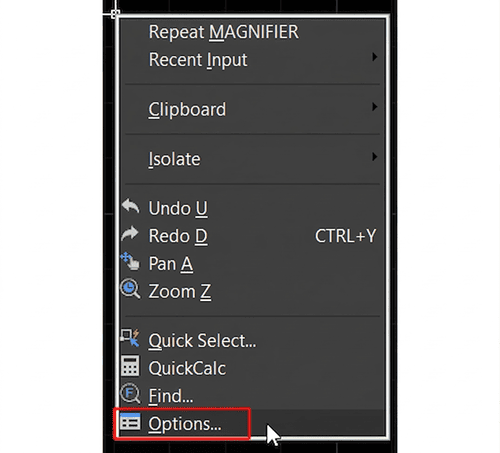
Select 「Options」, then click the 「User Preferences」 tab - 「Lineweight Settings」
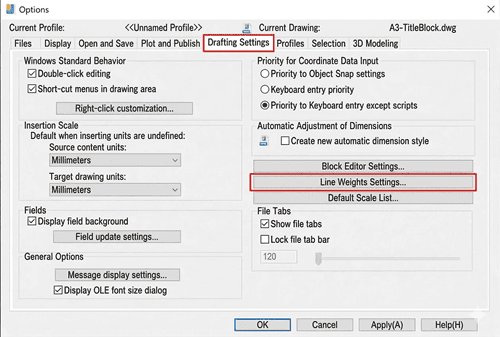
Check 「Display Lineweight」 and click 「OK」
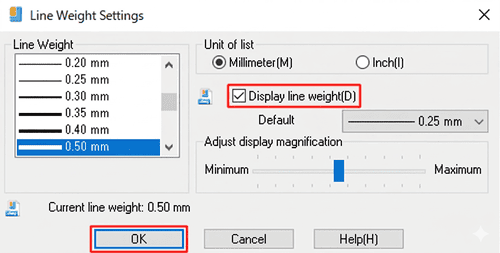
Clicking 「OK」 again will display the line as thick.
How to Create a Title Block in IJCAD
- Change the line weight of the drawing frame back to 「Bylayer」.
- Uncheck 「Endpoint」 in 「Object Snap」.
Turn on 「Snap Mode」.
The initial setting for 「Snap spacing」 and 「Grid spacing」 is 「10mm」.
Turn on 「Ortho Mode」.
- Execute the 「Line」 command.
「Specify first point」->Click A (「160mm」 to the left from the bottom right of the drawing frame)->Click B (「70mm」 up)->Click C (「160mm」 to the right), and press Enter
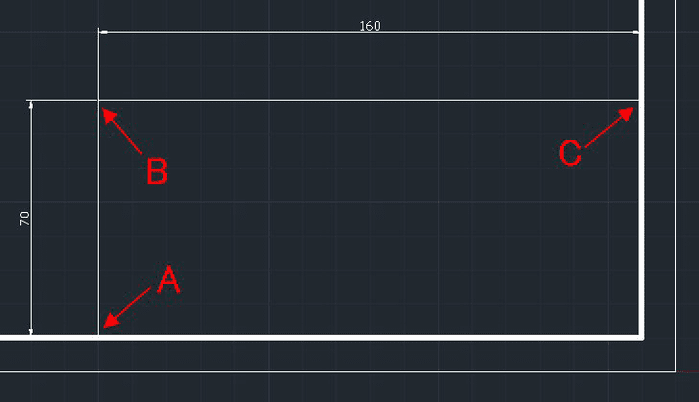
Create a straight line as shown below.
- Set the text font.
「Annotate」 tab -> 「Text Style Control」 -> Click 「Other」
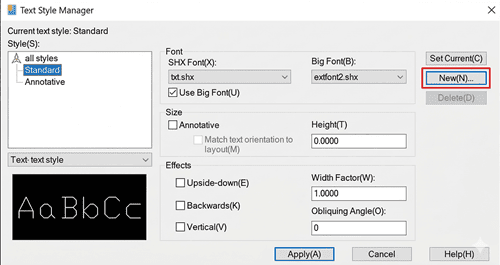
「New」 -> Enter the new style name 「NEW」
Uncheck 「Use Big Font」.
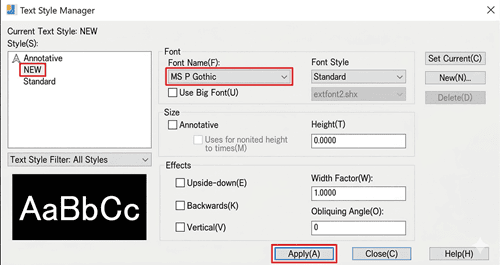
「Font Name」 -> 「MSP Gothic」 -> 「Apply」 -> Click 「Close」
5.Enter the names in the 「Title Block」.
Execute the 「Multiline Text」 command.
「Specify first corner」->Specify a point inside the frame->「Specify opposite corner」->
Specify a point for the text box->Enter 「Drawing Number」
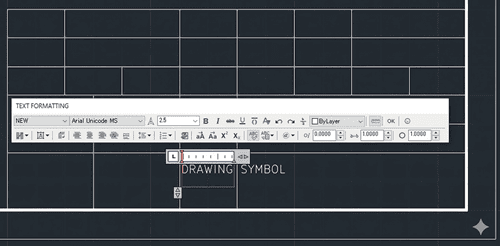
Click 「OK」
Uncheck 「Snap Grid」 and adjust the text position
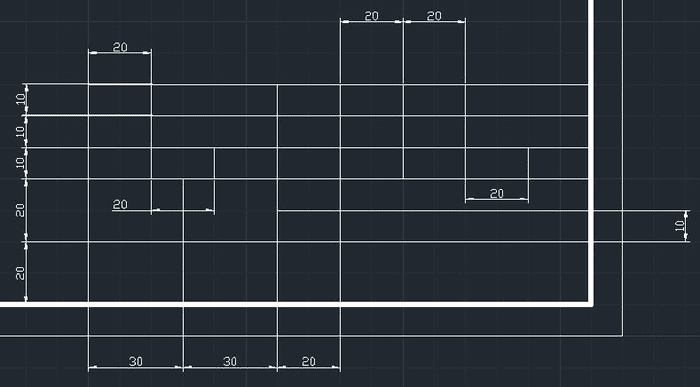
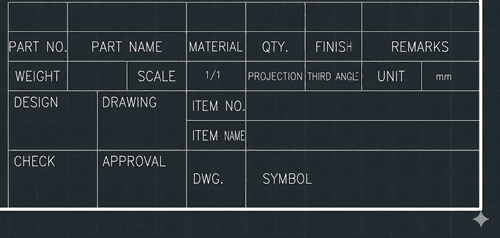
Enter the text strings in the title block as shown below.
Saving as a Template
Save the created drawing frame as a template.
How to Save the Drawing Frame as a Template
- Save as a template.
Click 「File」 -> 「Save As」
「Files of type」 -> Select 「AutoCAD Drawing Template」
「File name」 -> Enter 「A3 Title Block」
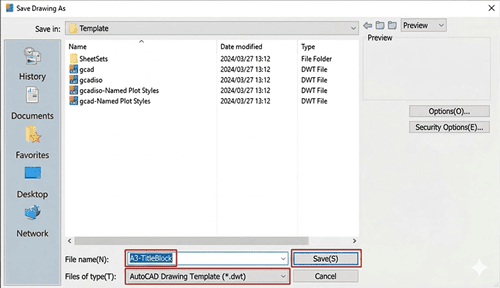
- Click 「Save」.
When creating a new drawing, if you set the file type to 「AutoCAD Drawing Template」,
the drawing frame will be displayed. You can select the appropriate drawing frame and begin your work.
Creating templates is just the beginning of a streamlined CAD workflow. If you frequently struggle with file compatibility or need to batch-convert legacy files into modern DWG/DXF formats, DARE is here to help.
DARE is a powerful cloud-based CAD conversion service designed for professionals.
・Instant Conversion: Convert PDF, DXF, and DWG files in seconds.
・High Precision: Maintain layers, line weights, and text integrity across versions.
・Browser-Based: No heavy software installation required.
Ready to simplify your CAD management?
Try DARE’s Free Conversion Tool Today and experience a faster, more reliable way to handle your design data.