"Chamfering" is used across various industries. We will explain the basic usage of the chamfer command.
目次
「開けない図面データが送られてきた…」そんなお悩みを1分で解決
DARE はブラウザだけで DWG・DXF・JWW・PDF などを相互変換・バージョンダウンができる無料サービスです。
ソフトのインストールも、面倒な待ち時間も不要。今すぐ変換して業務を再開しましょう!

What is Chamfering?
Chamfering means "shaving off a corner at a slant or rounding it." The primary reason for chamfering is to enhance safety.
In the case of mechanical drawings, if a metal corner is left sharp, there is a high risk of users getting injured or causing scratches due to the sharp edge. Chamfering dulls the sharpness to prevent injuries and makes it less likely to damage other objects upon contact. For similar reasons, wood in the construction field is often chamfered.
In addition to enhancing safety, chamfering an entrance can sometimes serve as a guide, making it easier for a mating object to enter.

Difference in Chamfer Names
- Chamfering・・・A general term for any part where a corner is shaved off, regardless of angle or size.
- C-Chamfering ・・・ Specifically refers to chamfering the corner at 45°.
- R-Chamfering・・・A method of chamfering by rounding the corner, which further increases safety. When creating an R-chamfer on a drawing, you use the FILLET command, not the Chamfer command.
How to Start the Command ?
There are two ways to start the Chamfer command:
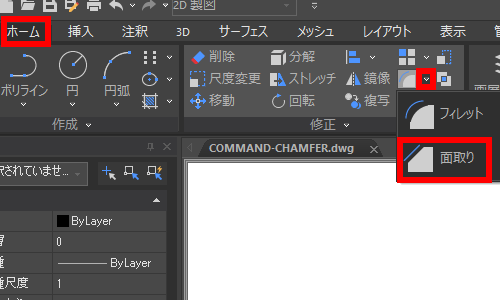
Home Tab
Select "Chamfer (CHAMFER)" from the Home tab → Modify panel.
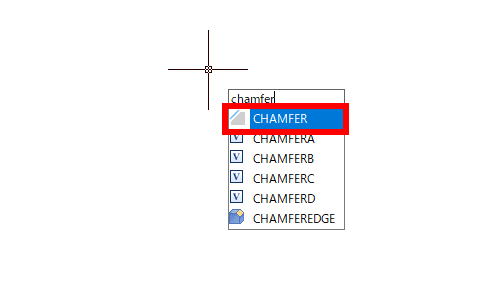
Type "CHAMFER" in the drawing area or the command line.
Basic Operations of the Chamfer Command
Chamfering by Specifying Two Distances
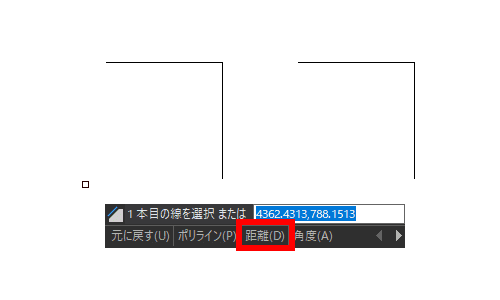
- Start the command. This time, we will launch it by selecting the icon from the Home tab.
- Select Distance (D) from the options.
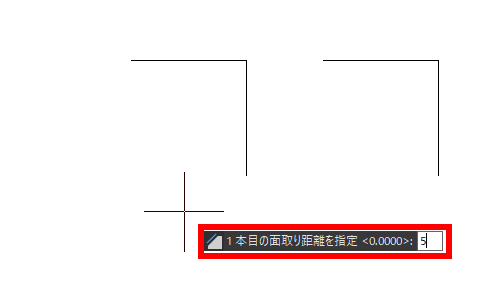
- Following the prompt "Specify first chamfer distance", enter a numerical value. This time, for a line segment of length 30, we enter 5 as the first chamfer distance.
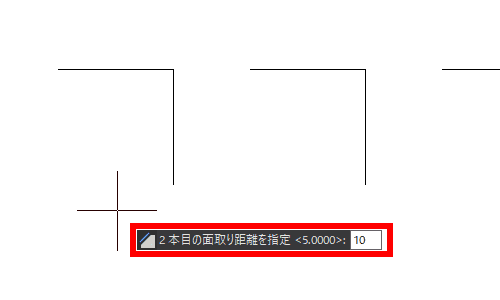
- Following the prompt "Specify second chamfer distance", enter a numerical value. This time, for a line segment of length 30, we enter 10 as the second chamfer distance.
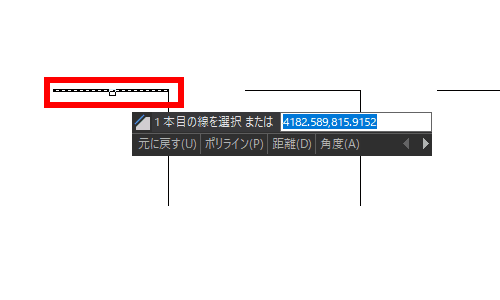
- Following the prompt "Select first line", select a line segment. The line segment selected here will be chamfered by the distance entered in ③.
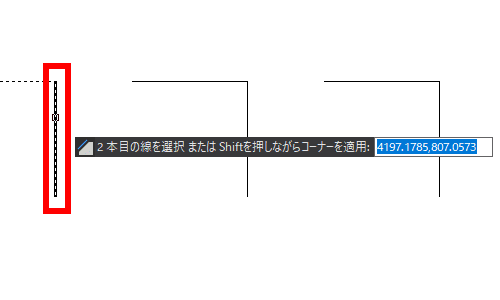
- Following the prompt "Select second line", select a line segment. The line segment selected here will be chamfered by the distance entered in ④.
- The chamfering is complete.
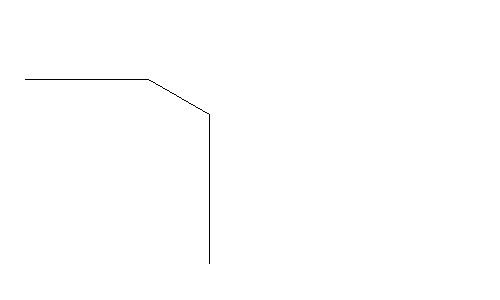
The chamfer distances are as follows.
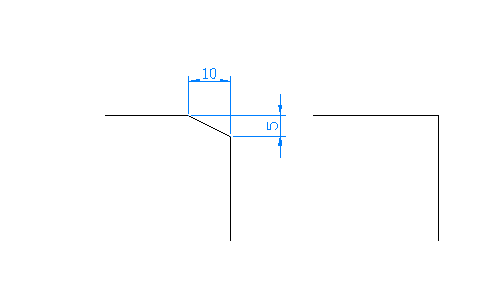
The chamfer distances are as follows. If the selection order of the first and second lines is reversed, the chamfer will also be reversed like this.
Chamfering by Specifying One Distance and Chamfer Angle
- Start the command.
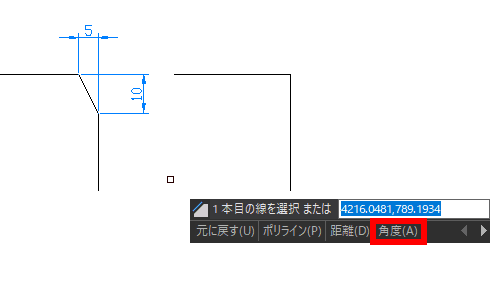
- Select Angle (A) from the options.
- Following the prompt "Specify chamfer length on first line", enter a numerical value. This time, for a line segment of length 30, we enter 10 as the first chamfer distance.
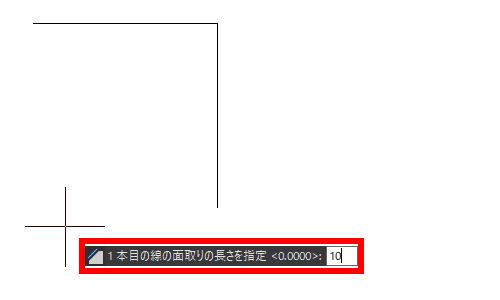
- Following the prompt "Specify chamfer angle from first line", enter a numerical value. This time, we enter 30 as the chamfer angle.

- Following the prompt "Select first line", select a line segment. The line segment selected here will be chamfered by the distance selected in ③.
- Following the prompt "Select second line", select a line segment.
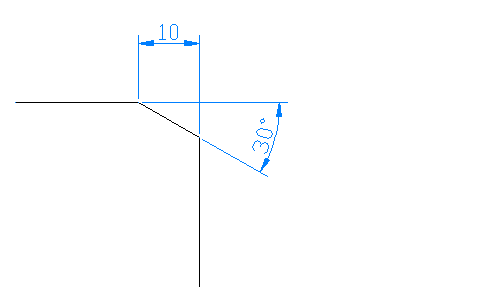
- The chamfering is complete.
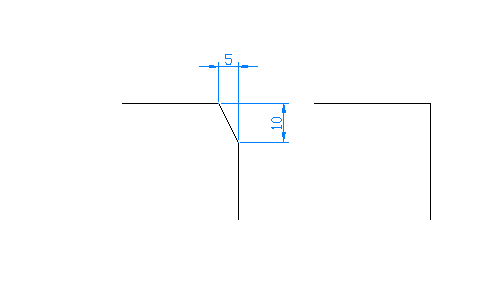
The chamfer distances are as follows.
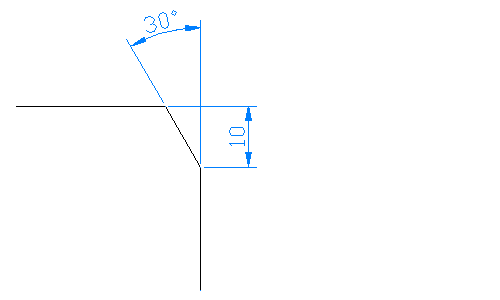
If the selection order of the first and second lines is reversed, the chamfer will also be reversed like this.
How to Chamfer All Corners at Once
You can chamfer all corners at once using the Polyline (P) option.
- Start the command.
- Select Polyline (P) from the options.

- The chamfer dimensions used most recently are currently set. If you wish to change them, modify the chamfer method from the options. The procedure for using the options is the same as explained above in "Chamfering by Specifying Two Distances" and "Chamfering by Specifying One Distance and Chamfer Angle."
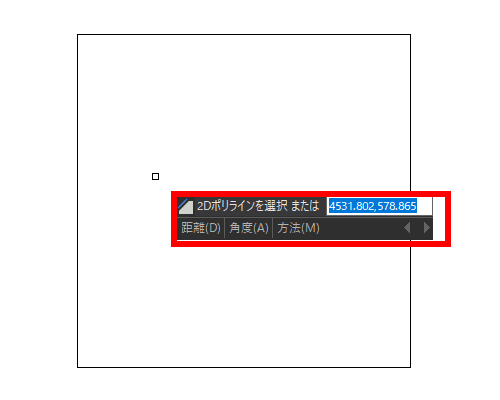
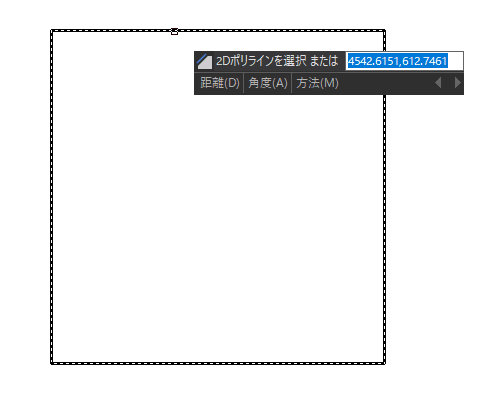
- Following the prompt "Select 2D polyline", select the polyline.
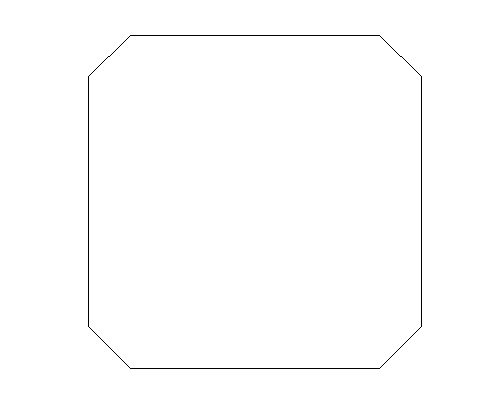
- All corners have been chamfered at once.
How to Chamfer Continuously
To perform chamfering of the same size continuously, select Multiple (M) from the options.

This allows you to perform continuous chamfering even without a polyline.
Summary
This time, we explained how to use the Chamfer command.
This command is frequently used in drawings across all industries, so we encourage you to master its usage.